PSEB Solutions for Class 9 Computer Science Chapter 6 MS Excel Part-IV
PSEB 9th Class Computer Solutions Chapter 6 MS Excel Part-IV
INTRODUCTION
Excel provides a lot of facilities to print our data and see before printing.
SETTING PAGE LAYOUT IN MS EXCEL
Page layout is used for printing of worksheet. Page Layout tab provides various commands. These commands control the way content is printed on page. These commands include several options like Margin, Page orientation, Paper size, Print area, header/footer and other printing related tasks. Some of the page layout options, such as print titles and page breaks, help to make workbook readable.
Margin
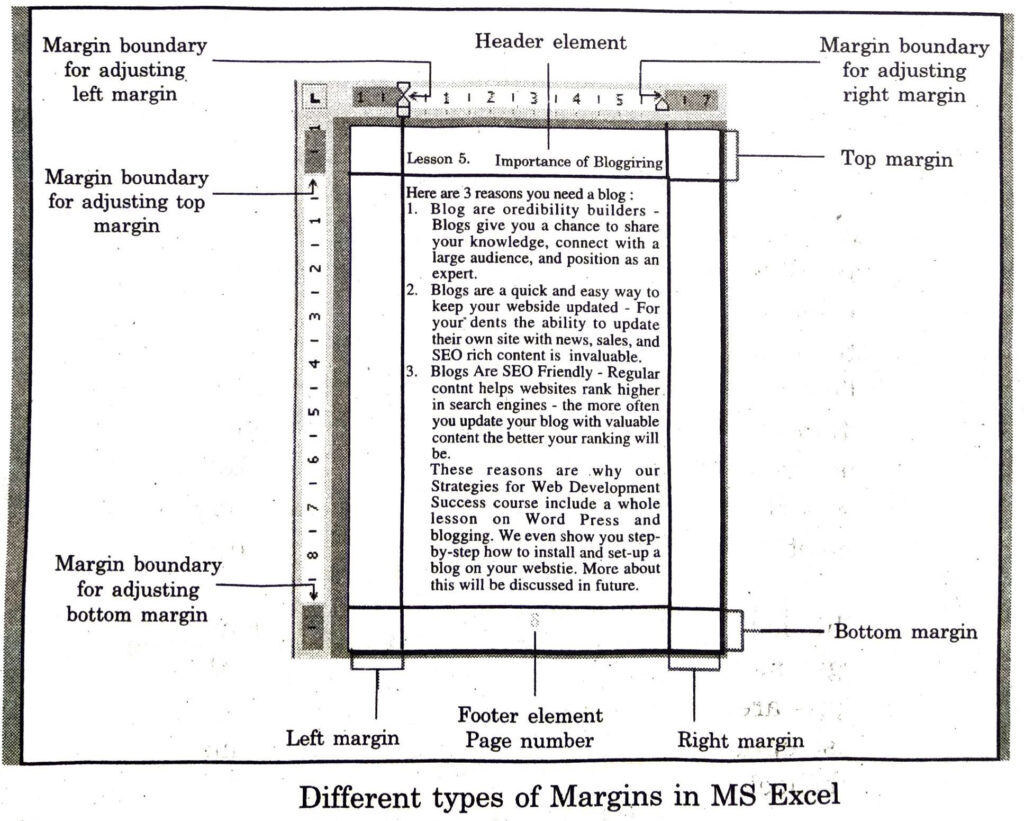
Margins are the empty space between the worksheet data and the left, right, top, and bottom edges of the printed page. Margin can be adjusted to add more or less space around contents on all the sides.
Setting Margins
Any margin can be changed according to the requirements. Margins can be changed from Page Layout Tab.
Applying Standard Margin
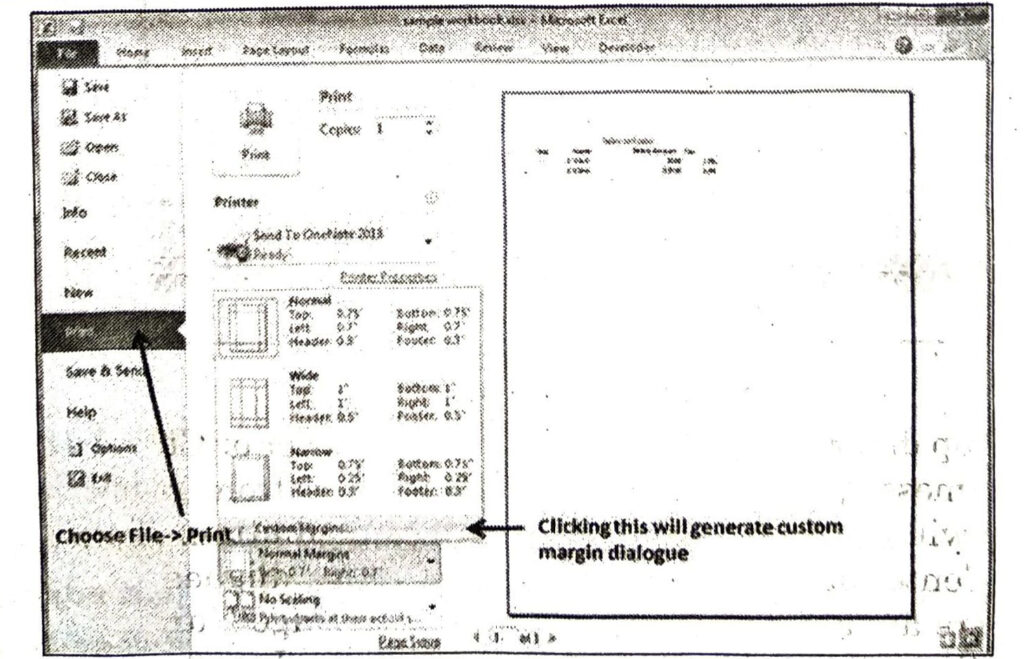
This is a simplest and fastest method of setting the margins in Excel. There are some pre-defined margin templates. Margin option from Page Setup group in Page Layout Tab can be used.
Margin templates given in excel are :
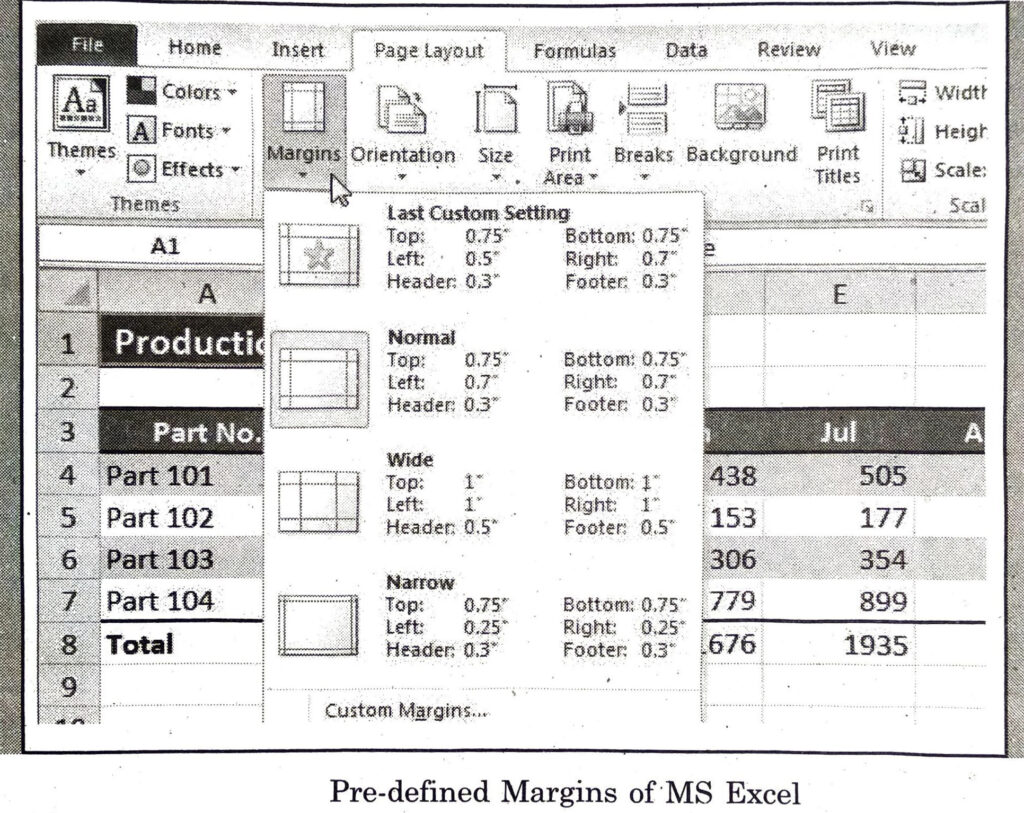
1. Last Custom Setting: Any size for margins in Excel can be set using “Custom Margins” option at the bottom of margin menu. Same margin can be applied for any of the worksheet with this option.
2. Normal : This is the default margin for every Excel Worksheet. It is having top and bottom margin as 0.75″. Left and Right margins in this template are 0.7″. Header and Footer margins are set at 0.3″ in size.
3. Wide: This is the largest size template for margins of Excel. It has all the margins pre-set as 1″ but the Header and Footer margins are set at 0.5″ in size.
4. Narrow: This is the template with smallest sizes for margins. It has top and bottom margin as 0.75″. Left and Right margins are 0.25″ and Header and Footer margins are pre-defined as 0.3″ in size.
Once any of these options is clicked, the selected size for margins will be applied to the current worksheet of Excel workbook.
Orientation
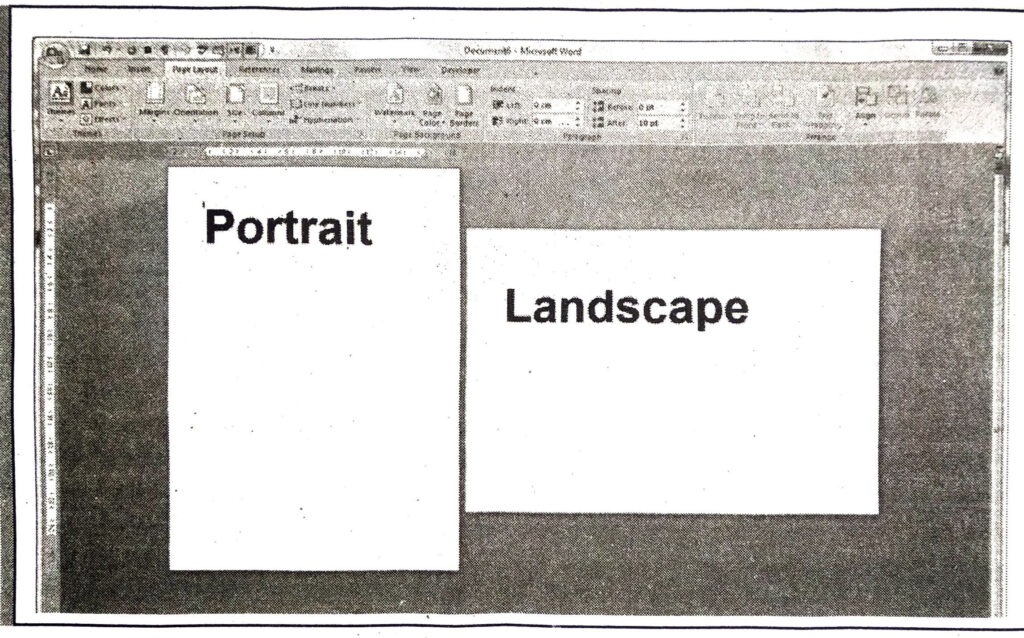
Page Orientation means how output is to be printed on the page/pages. Page can be printed either in vertical or horizontal direction. Excel provides two orientations for page. i.e.
Portrait and Landscape.
1. Portrait Orientation is used in the case when a report is longer and has less number of columns.
2. Landscape Orientation option of Page Layout is very useful. Worksheet is wider and number of columns are more to print.
These options can be used in following way :
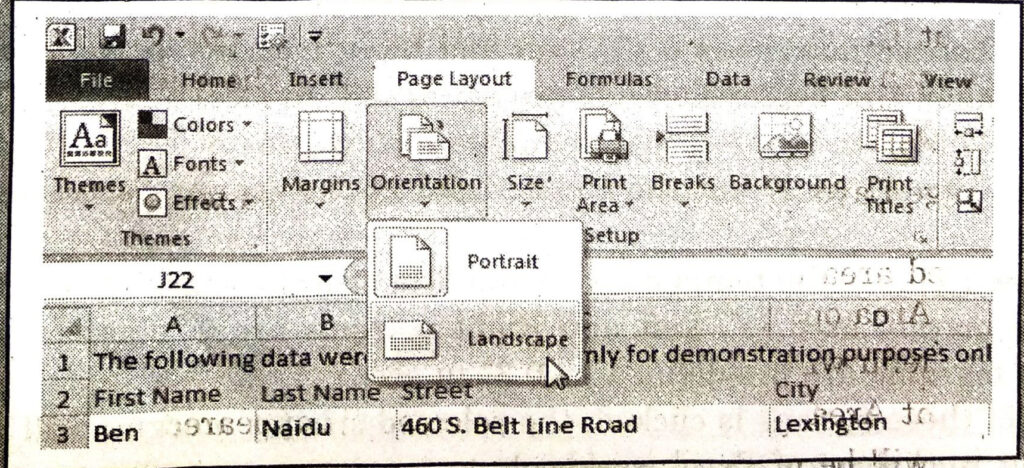
Changing page orientation from Page Layout Tab Ribbon :
This is a very easy method. Click on Orientation option from Page setup group in Page Layout Tab to change the page orientation in MS Excel.
Size
Size option of Page Layout Tab is used when the contents needs to be adjusted on a specific size of paper. Different sizes can be used such as Letter, A4, Legal, different types of Envelops etc.
Changing Size from Page Layout Tab Ribbon:
This method of choosing paper size in Excel is very fast and easy.
- Click on Size option from Page Setup group in Page Layout Tab to change the page orientation in Excel.
- It will display all the pre-defined options of Paper Size available in Excel.
- Menu will display all the size options to be used as a paper size.
- Choose any one size from this menu. The current selected Paper size will be displayed highlighted already in the menu.
Print Area
Sometimes, it is required to print only a specific part of a worksheet. Print Area option of Page Layout Tab can be used for this purpose. Once a print area is specified, the printing contents can be seen. Its layout can be viewed with the help of print preview.
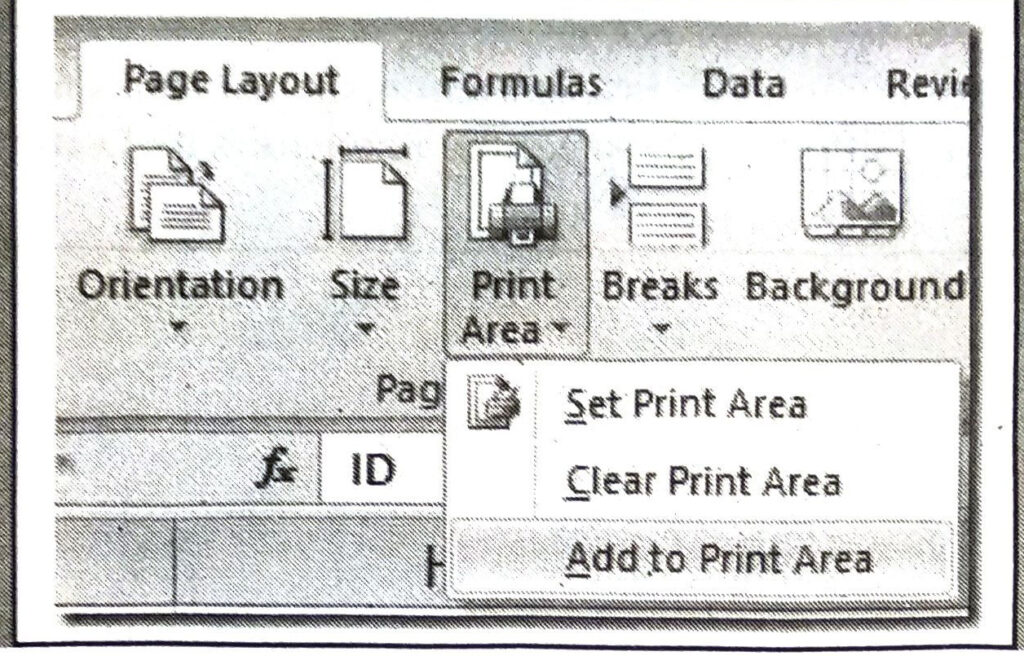
Set Print Area
This option of Page Layout Tab will define a new print area when following steps are used.
Select the required area to be marked as a print area.
- Click of Print Area option of Page Layout Tab.
- A dropdown menu will appear.
- Select Set Print Area option from dropdown menu appeared.
- Selected area will be marked as print area.
- Print Preview can be used to see the content before printing.
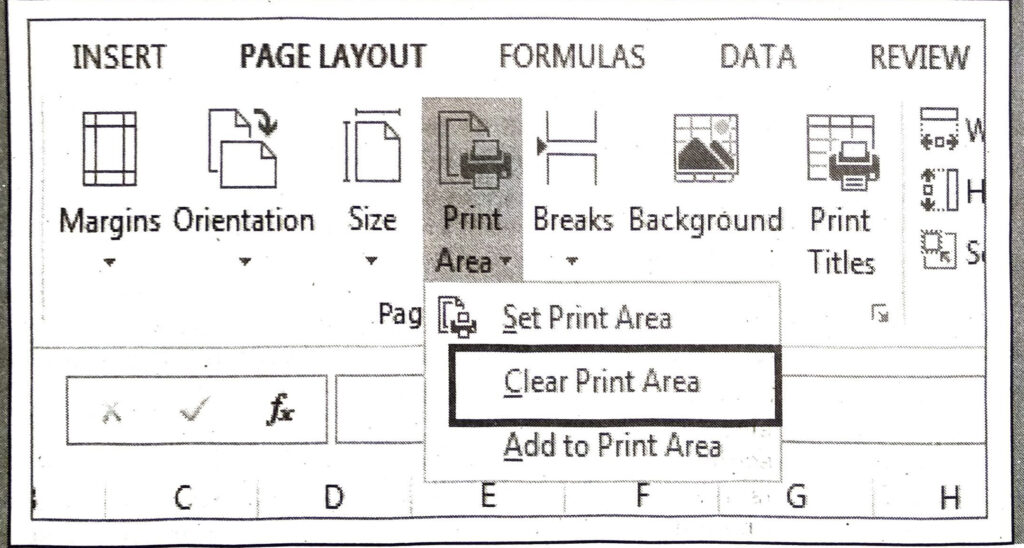
Clearing Print Area
Once a print area is set in a worksheet, no other content will be printed for as long as print area exists. If whole sheet is needed to print again then existing print area needs to be cleared using Clear Print Area option of the same menu of Print Area of Page Layout Tab.
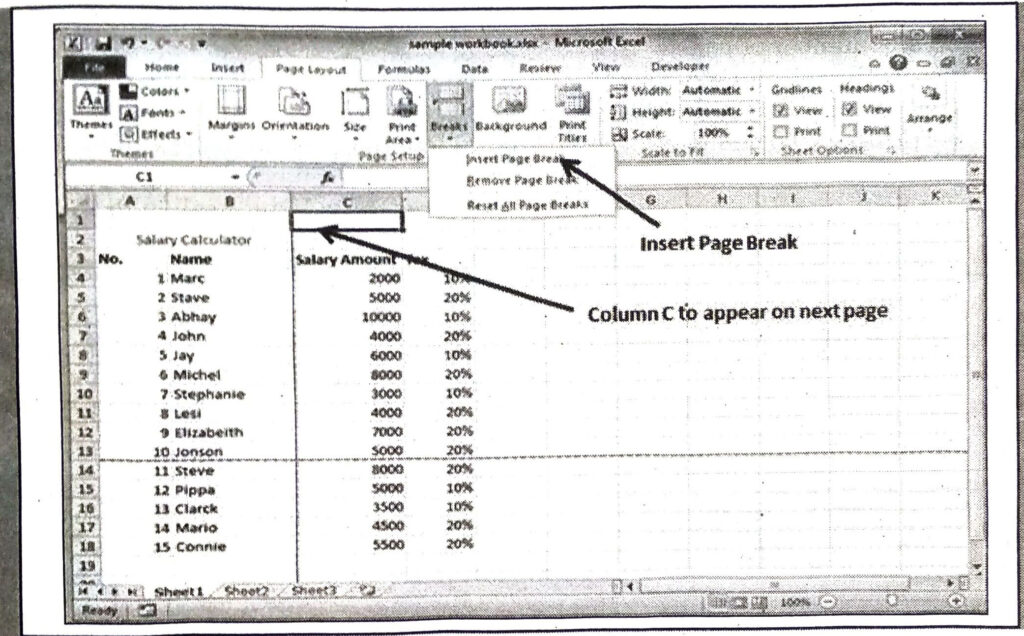
Page Break
Page Break option of Page Layout Tab is very useful to split contents to be printed among different pages. All the contents remain printable but on different pages. Print area on the other hand prints only the selected part of worksheet and all other contents are skipped from being printed.
Page break is always inserted at top left corner of active cell. A page break can be inserted using ahead steps:
- Place the active cell accordingly to the desired location where Page Break is to be inserted.
- Click on Breaks option from Page Layout Tab.
- Select Insert Page Break from the menu appeared.
After these steps, the page break effect can be seen in print preview option.
Existing page break can be removed with the help of Remove Page Break option of the same menu of Break option of Page Layout Tab after placing active cell on the existing page break.
Scaling
Scaling refers to compression or. expansion of the size of contents when printed on the specific paper size. This option is very useful when a large worksheet needs to be adjusted on one or more pages when printed. A small content can be expanded over multiple pages. This option can be used as follows:
Setting Scaling using Print Preview option :
This option is very easy when whole content is to be adjusted on page or one aspect either row wise or column wise. This option can clicking Scaling option displaying as a last option of Print Preview menu.
There are following options available:
- Fit Sheet on One Page: This option of scaling fits a worksheet on one page. It will reduce the scaling percentage automatically.
- Fit All Columns on One Page : This option of scaling will fit all the columns on one page. It will reduce the scaling percentage as much the whole contents become horizontally fit on one page. The vertical length of the contents can be on any number of pages.
- Fit All Rows on One Page : This option of scaling will fit all the rows on one page. It will reduce the scaling percentage as much as whole contents become vertically fit on one page. The horizontal length of the contents can be on any number of pages.
- No Scaling : This option of scaling will reset the existing scaling to 100%.
Setting Header and Footer
Header is the content which appears at the top of each printed page and footer is the content which appears at bottom of each page.
This option is useful to add any important information like page number, file name or any other custom message. This option can be used from Page Setup dialog box. This option can be used as under :
In the Page Setup dialog box, we can use Custom Header or Custom Footer buttons to give a custom message to be displayed at top or bottom respectively. Header/ Footer dialog box will be opened by clicking any of the button. It will display three sections as Left, Center or Right contents added can be aligned according to any of these options. There are also other options like Insert Page Number, Insert Number of Pages, Insert Date, Insert Time, Insert File Name, Insert Picture etc. on this dialog box.
Another option for Header or Footer is applying any of the Header/Footer from pre-defined template. Required template can be used to easily apply Header or Footer.
Setting Page Layout using Print Preview Window
Page Layout settings can also be changed through Print preview window. When Print option from File tab is chosen, then following windows appeared which also displays Print preview.
- Orientation Page orientation can be changed when the print preview of worksheet is displayed. To apply page margins using this way, go to print option of File menu. The Page Orientation option is just above the Paper size option. Both portrait and landscape options are displayed. The required option can be chosen and the changed page layout setting will be displayed in print preview.
- Size: Page size can also be changed when the print preview is displayed. The paper size option just above the margin option. All the paper sizes will display when it is clicked. The required option can be selected and the changed paper size will be displayed in print preview.
- Margin: In some cases, the margin are adjusted with the help of mouse. To apply this way of setting margins in Excel, use print preview option of File menu. The dotted lines are displayed in print preview window of print option. If these lines are not showing there then “Show Margins” button is pressed to display at right bottom of the print menu. These dotted lines can be moved with the help of mouse to adjust any of the margins being displayed. When any of the margin is changed, the print preview will be updated accordingly.
- Scaling Scaling is the process of compressing or expanding the contents to be arranged on a specific page. It can be changed. Any type of scaling can be applied in Print Preview Window.
WORKING WITH DIFFERENT VIEWS IN MS EXCEL
View refers to the way of how working area in the software look like. Different views are available in Excel. Each one of them is very important as they have different methods to represent contents. They can be used at any specific time in a same spreadsheet to have best management. There are five different types of views available in excel.
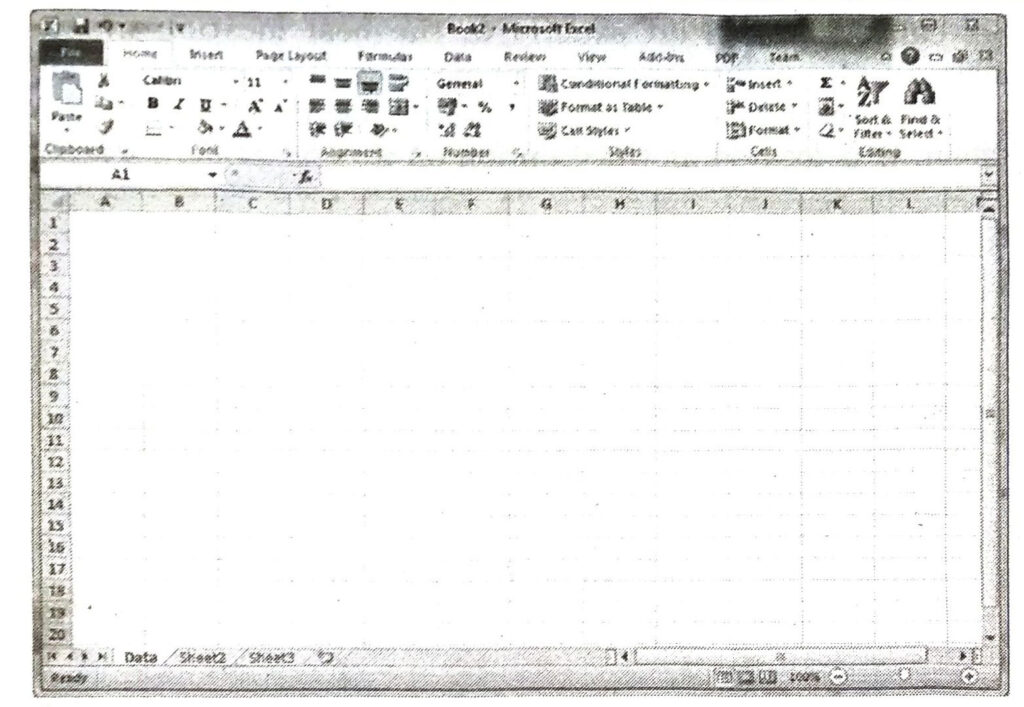
1. Normal View (Default View)
2. Page Layout View
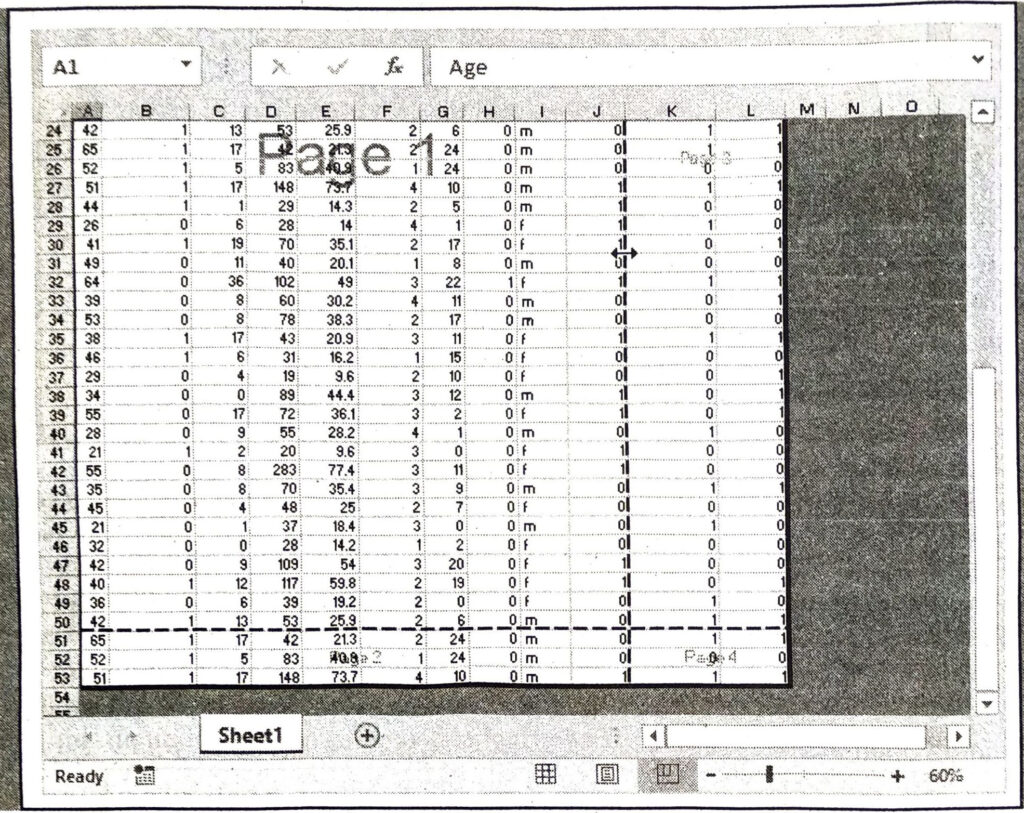
3. Page Break Preview
4. Custom Views
5. Full Screen View
1. Normal View: This is a default view of MS Excel. When Excel is opened then it is automatically displayed in Normal View. This view is the easiest view to use for managing data, creating formulas and formatting rows and columns. All the rows and columns header are displayed just adjoining to the respective row or column in this view. This made it more easy to work with these. The name of row or column can be easily identified. This view gives the best zoom level to work. View can be changed to Normal view from the View Tab ribbon. The option to activate this view is located as a first option on this ribbon.
2. Page Layout View: This view is basically concerned about displaying contents page wise. It helps to have best layout of contents on each page. This view can be used to add design elements to the Headers and Footers of a worksheet, such as company logos, page numbers, document names, dates and times. These elements are not visible in other view types, but will print with each page of the workbook. The main aim of using this view is to have best management of data on particular pages when printed. View can be changed to Page Layout View from the View Tab ribbon. The option is located as second option on this ribbon.
3. Page Break Preview: This view is mainly concerned with Printing of worksheet. This View is a very powerful print preview that allows to manually move page breaks and reorganize a worksheet into pages for printing. Columns or rows can be broken off exactly to the best location in this view. The arrangement of contents on different pages will be exactly same as printed. This view of Excel can be seen by selecting Page Break Preview option of View tab ribbon. It is located as third option on it.
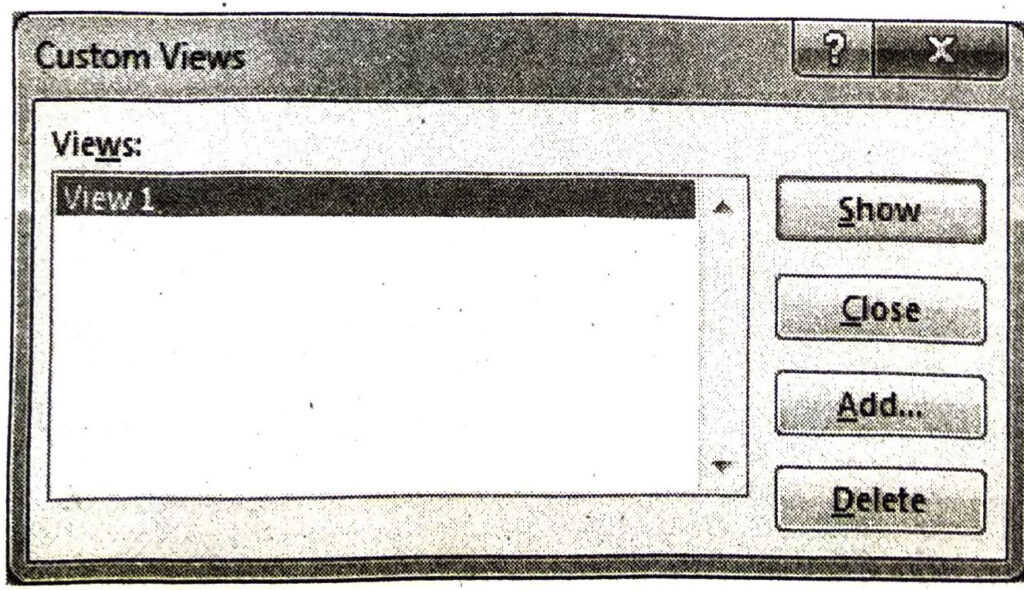
4. Custom View : Custom View allows to set the exact view and print settings preferred and allows to apply this view to other worksheets, if required.
5. Full Screen View: This view can be used with any of the currently active view. It is used for maximizing work area by hiding everything else. Just the work area of spreadsheet is displayed along with row or column Headers when the sheet is viewed in this view. This can be used by clicking Full Screen option of View Tab Ribbon.
PROTECTING WORKSHEET AND WORKBOOK
Protection in Excel refers to restrict workbook or worksheet from unauthorized access. There are two types of protection :
1. Worksheet Protection
2. Workbook Protection
Protecting Worksheet
Protect Worksheet option is used to protect the data entered in worksheets. This is done with the help of a password. The users can prevent the other users to unhide worksheet, add worksheet, to delete.worksheet or rename worksheet with the help of this password. In simple language protection means to save our content from unauthorised authentication. the data in excel can be protected from unauthorised access by protecting worksheet as well as workbook.
Steps to Protect Worksheet
Following steps are used to protect the worksheet :
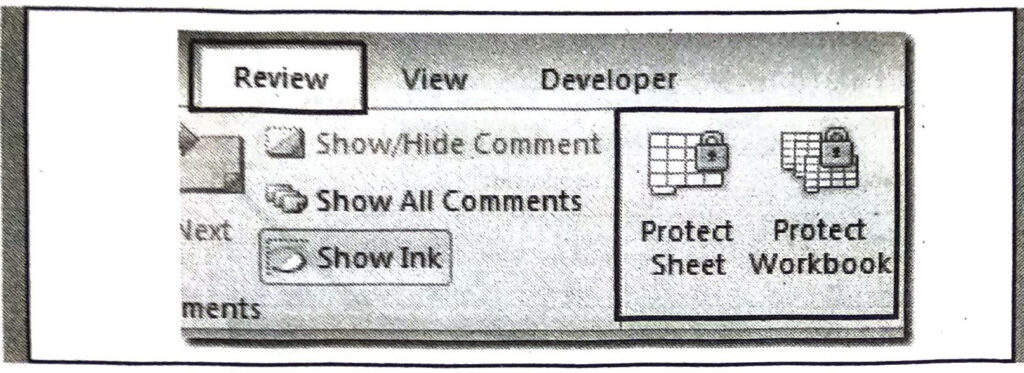
(i) Right click on the worksheet tab or go to review tab.
(ii) Click on protect sheet.
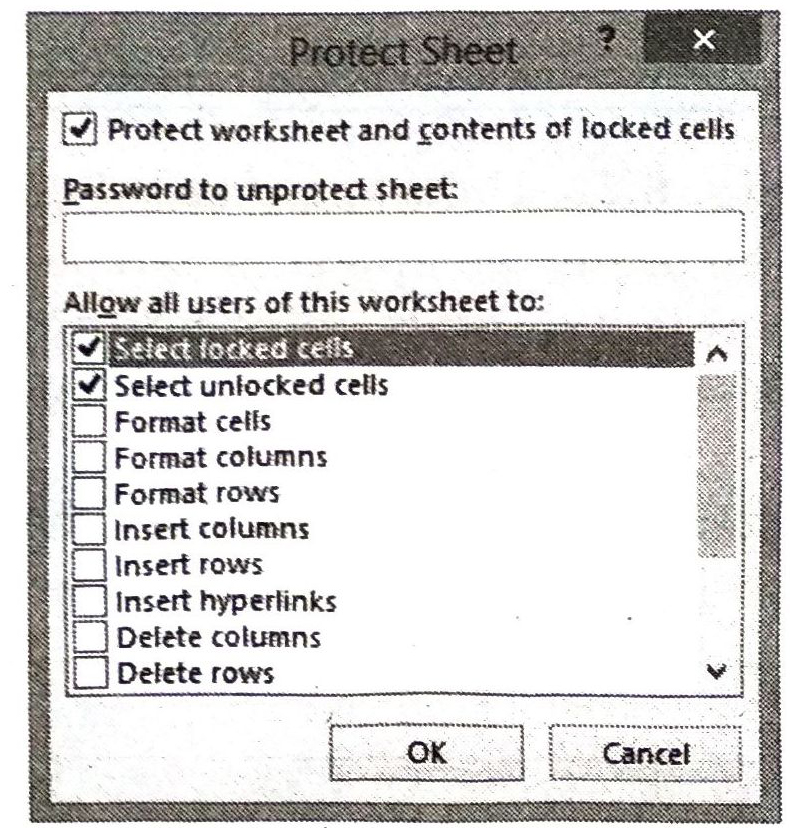
(iii) Select the task for which is to be granted.
(iv) Enter the password.
(v) Click on the OK button
If no option is selected then the user can only view the Excel File.
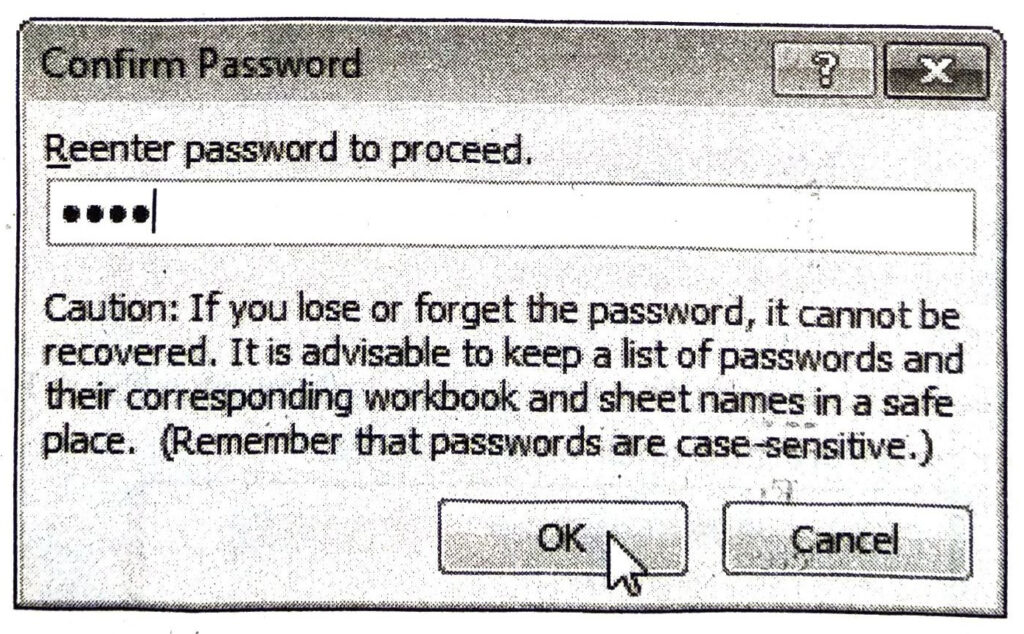
(vi) Confirm your password and click on OK button.
Now the worksheet is protected. It cannot be used by a person who does not have a password. The worksheet needs to be unprotected if we want to work on that worksheet.
The cells in a worksheet can be protected and they can be unprotected when we want to change their content. For this unprotect sheet button is used on the Review tab. The user needs to enter the password to unprotect the worksheet and then OK button is pressed.
Now the worksheet is unprotected. In protected worksheet the user cannot change the data of protected cell, this is very useful feature to protect our data.
After entering the correct password, sheet will be unprotected by clicking OK.
Protecting MS Excel Workbook
Protect Sheet option is used to safeguard the data with the help of a password. Any row, column or cells can be locked from any of the operation been performed by unauthorized person. To prevent users from viewing hidden worksheets, adding, moving, deleting or hiding worksheets and renaming worksheets. The structure can be protected with a password. The method of protecting a worksheet is a series of steps to be performed.
When all the cells are become locked. If it is so then the sheet may not be useful for any other person. To have best use in a protected sheet, it should be unlocked. The unlocked cell will be able to be changed even in protected sheet. The values of these unlocked sheets can be used in the formulas in locked cells also. Sheets can be protected as follows.
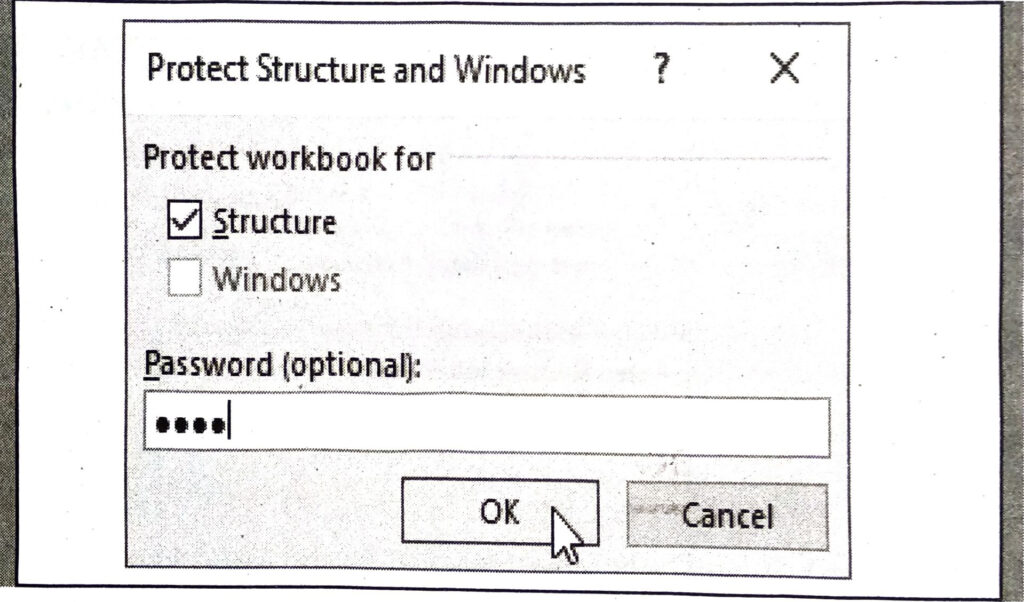
A workbook can be protected easily as we have protected a worksheet. A workbook can be protected such as:
Structure: If we protect the workbook structure, users cannot insert, delete, rename, move, copy, hide or unhide worksheets anymore.
Windows: If we protect the workbook windows, we cannot move, change the size and close windows anymore.
Steps to protect workbook: Following steps are used to protect workbook.
(i) Open a workbook.
(ii) On the Review tab, click Protect Workbook.
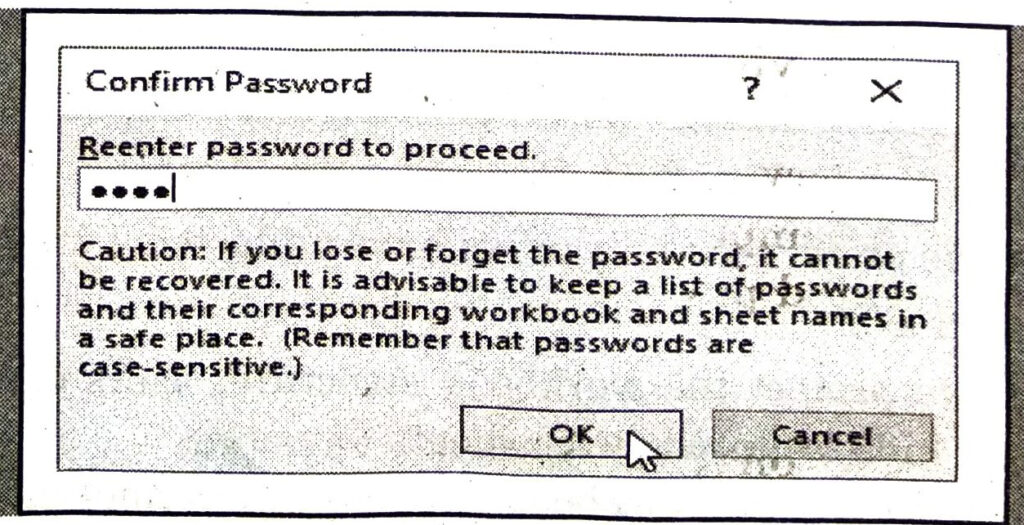
(iii) Check Windows enter a password and click OK.
(iv) Re-enter the password and click on OK.
Computer Guide for Class 9 PSEB MS Excel Part-IV Textbook Questions and Answers
Fill in the Blanks :
1. Which option belongs to Page Layout Tab ?
(A) Page Orientation
(B) Paper Size
(C) Print Area
(D) All of these.
Ans. (D) All of these.
2. Which one is not a view in MS Excel ?
(A) Formula View
(B) Normal View
(C) Page Layout View
(D) Page Break Preview.
Ans. (A) Formula View
3. …………………… is the empty space between the worksheet data and the edges of the printed page.
(A) Paper Size
(B) Print Area
(C) Margin
(D) Print Preview.
Ans. (C) Margin
4. ………………… appears on the top of each page in print preview and printed sheets.
(A) Footer
(B) Header
(C) Bottom Margin
(D) None of these.
Ans. (B) Header
5. We can lock our cells from being accidently changed with the help of …………… Option.
(A) Save As
(B) Save
(C) Print Area
(D) Protect Sheet.
Ans. (D) Protect Sheet.
Write True or False :
1. Workbook cannot be protected in MS Excel.
Ans. False
2. We cannot remove Page Break once inserted.
Ans. False
3. Page Orientations are of two types : Portrait and Landscape.
Ans. True
4. Margins can be on top, bottom, left, right Header and Footer of a page.
Ans. True
5. We can use Print Area option to print a specific part of a Worksheet.
Ans. True
Short Answer Type Questions :
Q. 1. What do you mean by Margin
Ans. Margins are the empty space between the worksheet data and the left, right, top and bottom edges of the printed page. Margin can be adjusted to add more or less space around contents on all the sides.
Q. 2. Write a short note on Page Orientation.
Ans. Page Orientation means how output is to be printed on the page/pages. Page can be printed either in vertical or horizontal direction. Excel provides two orientations for page. i.e. Portrait and Landscape.
Q. 3. What do you mean by Scaling ?
Ans. Scaling refers to compression or expansion the size of contents when printed on the specific paper size. This option is very useful when a large worksheet needs to be adjusted on one or more pages when printed.
Q. 4. Give names of views in MS Excel.
Ans. There are five different types of views available in excel. ..
(i) Normal View (Default View)
(ii) Page Layout View
(iii) Page Break Preview
(iv) Custom Views
(v) Full Screen View.
Q. 5. What is the use of Page Break?
Ans. Page Break option of Page Layout Tab is very useful to split contents to be printed among different pages. All the contents remain printable but on different pages. Print area on the other hand prints only the selected part of worksheet and all other contents are skipped from being printed.
Long Answer Type Questions :
Q. 1. What do you mean by Page Layout ? Explain three Page Layout options.
Ans. Page layout is used for printing of worksheet. Page Layout tab provides various commands. These commands control the way content is printed on page. These commands include several options like Margin, Page orientation, Paper size, Print area, header/footer and other printing related tasks. Some of the page layout options, such as print titles and page breaks, help to make workbook readable.
- Margins: Margins are the empty space between the worksheet data and the left, right, top, and bottom edges of the printed page. Margin can be adjusted to add more or less space around contents on all the sides.
- Orientation : Page Orientation means how output is to be printed on the page/pages. Page can be printed either in vertical or horizontal direction. Excel provides two orientations for page. i.e. Portrait and Landscape.
- Portrait Orientation is used in the case when a report is longer and has less number of columns.
- Landscape Orientation option of Page Layout is very useful. Worksheet is wider and number of columns are more to print.
- Print Area: Sometimes, it is required to print only a specific part of a worksheet. Print Area option of Page Layout Tab can be used for this purpose. Once a print area is specified, the printing contents can be seen. Its layout can be viewed with the help of print preview.
Q. 2. Explain any two views of MS Excel in detail.
Ans. View refers to the way of how working area in the software look like. Different views are available in Excel. Each one of them is very important as they have different methods to represent contents. They can be used them at any specific time in a same spreadsheet to have best management.
- Normal View: This is a default view of MS Excel. When Excel is opened then it is automatically displayed in Normal View. This view is the easiest view to use for managing data, creating formulas and formatting rows and columns. All the rows and columns header are displayed just adjoining to the respective row or column in this view. This made it more easy to work with these. The name of row or column can be easily identified. This view gives the best zoom level to work. View can be changed to Normal view from the View Tab ribbon. The option to activate this view is located as a first option on this ribbon.
- Page Layout View: This view is basically concerned about displaying contents page wise. It helps to have best layout of contents on each page. This view can be used to add design elements to the Headers and Footers of a worksheet, such as company logos, page numbers, document names, dates and times. These elements are not visible in other view types, but will print with each page of the workbook. The main aim of using this view is to have best management of data on particular pages when printed. View can be changed to Page Layout View from the View Tab ribbon. The option is located as second option on this ribbon.
Q. 3. What is Header and Footer? How will you apply Header and Footer in Excel?
Ans. Header is the content which appears at the top of each printed page and footer is the content which appears at bottom of each page.
This option is useful to add any important information like page number, file name or any other custom message. This option can be used from Page Setup dialog box. This option can be used as under :
In the Page Setup dialog box, we can use Custom Header or Custom Footer buttons to give a custom message to be displayed at top or bottom respectively. Header/ Footer dialog box will be opened by clicking any of the button. It will display three sections as Left, Center or Right contents added can be aligned according to any of these options. There are also other options like Insert Page Number, Insert Number of Pages, Insert Date, Insert Time, Insert File Name, Insert Picture etc. on this dialog box.
Another option for header or footer is applying any of the Header/Footer from pre-defined template. Required template can be used to easily apply header or footer.
PSEB 9th Class Computer Guide MS Excel Part-IV Important Questions and Answers
Fill in the Blanks :
1. Margins are of ………………. types.
(A) 2
(B) 3
(C) 4
(D) 5
Ans. (C) 4
2. ……………. is used to print data of different size on particular paper size by reducing For increasing its size.
(A) Margin
(B) Header
(C) Page break
(D) Scaling.
Ans. (D) Scaling.
3. Excel has ……………….. main views.
(A) 2
(B) 3
(C) 4
(D) 5
Ans. (B) 3
4. In Excel …………………….. can be protected.
(A) Worksheet
(B) Workbook
(C) Both of these
(D) None of these
Ans. (C) Both of these
Write True/False :
1. Data cannot be printed in Excel.
Ans. False
2. Margin cannot be set on right side.
Ans. False
3. Orientation is of two types.
Ans. True
4. Page break can be printed on paper.
Ans. False
Short Answer Type Questions :
Q. 1. Explain normal margin.
Ans. This is the default margin for every Excel Worksheet. It is having top and bottom margin as 0.75″. Left and Right margins in this template are 0.7″. Header and Footer margins are set at 0.3″ in size.
Q. 2. Explain narrow margin.
Ans. This is the template with smallest sizes for margins. It has top and bottom margin as 0.75″. Left and Right margins are 0.25″ and Header and Footer margins are pre-defined as 0.3″ in size.
Q. 3. How print area is set in Excel ?
Ans. This option of Page Layout Tab will define a new print area when following steps are used:
Select the required area to be marked as a print area.
(i) Click of Print Area option of Page Layout Tab.
(ii) A dropdown menu will appear.
(iii) Select Set Print Area option from dropdown menu appeared.
(iv) Selected area will be marked as print area.
(v) Print Preview can be used to see the content before printing.
Q. 4. How print area is cleared ?
Ans. Once a print area is set in a worksheet, no other content will be printed for as long as print area exists. If whole sheet is needed to print again then existing print area needs to be cleared using Clear Print Area option of the same menu of Print Area of Page Layout Tab.
Follow on Facebook page – Click Here
Google News join in – Click Here
Read More Asia News – Click Here
Read More Sports News – Click Here
Read More Crypto News – Click Here